HONDA VALVE ADJUSTMENT
This is NOT a how to. This is a rant. Just another rant. Maybe next time I will create a how-to.
A couple of months ago it was time to check the valve adjustment. This was the second time I did this job. Not a real problem to do. There are 4 valves per cylinder, and 4 cylinders so there are 16 valves to check. The biggest pain to this job is getting the Tupperware off. Removing the plastic body panels takes longer than it should, as does putting it all back on. I estimate 45 minutes off and 45 minutes on. That means ANY job that needs the Tupperware removed is already going to take you 1.5 hours, before you even do anything.
Honda uses an overhead cam arrangement. Each engine side has two cams. It is a simple matter of removing the covers and rotating the engine to the right position for each cylinder. The pain here is that you must look into a view hole in the front of the engine to see a small mark as it rotates past the hole. Between the positioning and the size of the mark it is nearly impossible, especially without the bike on a lift. Using a mirror works, but holding the mirror while you rotate the engine is seriously tricky. If your eyes are not exactly as good as they were a few years ago it is even more difficult.
I solved this problem after the first time I did the job. I bought a web cam for my laptop computer. These don't focus very well really close up, so I duct taped a magnifying loupe onto the camera. Basically a lens. Using a magnet to mount it to the radiator in just the right position allowed me to see, magnified, the mark as it rotated by. Saved a ton of effort. I can see this as being a useful tool for a lot of jobs where you need to see somewhere that you can't really get to. I don't know how many times I had to do work under a dashboard of a car by hanging upside down with my head jammed under the dash. This was a lot easier a few years and a few crashes ago.
Once the valves are checked, you can button it back up. UNLESS, you need to adjust the valves. This Honda uses what is called shim under bucket. Not to get into too much detail, but there is a metal cup that fits over the end of the valve and spring. Between this cup and the valve is a shim. The shims come in many sizes. To adjust a valve, you simply replace the shim with one of a different size. Simple, right? Yeah, right.
To take the buckets off, the cams need to be removed, or at least lifted up. This is a reasonably involved job, with potentials for royal screw-ups, such as dropping a bolt into the dark regions of the engine, or putting the cams back the wrong way. This could kill the engine.
If the valves on the RIGHT side of the engine need adjusting, then it becomes a bit more involved. The chain that drives the cams has a tensioner assembly on it. This assembly has to be loosened. On the left cam, this adjuster is on the outside of the engine. For the right cam, the adjuster is underneath EVERYTHING. The fuel tank has to come off, requiring draining of the gas. AND replacement of some of the hoses, as they tend to rip and leak if used again. Then there is the airbox, which is not as simple to take off as one would think. Then the throttle body, including the pressurized fuel lines. All of the parts removed seem to require replacing a gasket or a sealing washer, or both. Then there is the antifreeze, which you can get away with not removing if you are careful. There are numerous electrical connectors, which are easy to forget about when reassembling. And don't drop anything into the intake. Careful not to mess up any of the adjustments by loosening the wrong bolt, or pulling on the wrong part.
All of this is to get at one small adjuster. If they had put this bugger on the outboard side of the engine, it would save about 1.5 hours, after all, this stuff has to be put back on too.
The adjusting of the valves is not super involved, but it does require removal and replacement of the cams. Once the shims are switched ( you did record what size was on each valve?) then you have to check again.
This job took me about 16 hours the first time. Granted, this included research, trial and error and triple checking, but even with experience I doubt I could get the time much less than 8 hours. This is a job best combined with any other jobs you can think of that require removal of the Tupperware.
I was pissing an moaning a lot on this job. It should be a quick and easy job. I would have to say it IS fairly easy, but it is definitely NOT quick. I adjusted the valves on my KLR 650 in Mexico outside a Hostel, with a Tequila in one hand and I don't think it took me an hour. Most of that was trying to find the magic dust that is needed to make the valve cover come off. That is one that requires all the planets to be aligned just right, then it comes off easy, but not before.
One of the things that pissed me off about this job was not the job itself. There are a fair number of parts, mostly gaskets that need replacing (or at least it is a good idea to replace them). I had a gift certificate for Bike Bandit, an on-line seller of all things motorcycle. I ordered the things that needed to be replaced, as well as those things that it would be a good idea, just in case I lost or broke something. I also ordered the valve adjustment kit. There are two ways to get the shims. One way is as a single kit, with three of each size shim in a plastic compartment box. The other way is to buy one or more of the refill kits. The refill kits have 5 of each shim in a range. I had previously measured the shims and knew that I would need a bunch of shims from the mid-size kit, and soon a bunch from the small-size kit. I bought both, knowing that I would have to compromise to have enough of the sizes I needed. These two replacement kits cost about the same as the full kit that only had 3 of each size. Just my luck that I needed mostly a couple of sizes and could not get away with a kit with only 3 of each. Obtaining these parts locally was possible, but I foolishly thought I could get them faster on-line.
Anyway, I ordered the parts after taking the bike apart. I ordered them on a Friday, and it said things would ship in 3 days. Well, 5 days later, I was told some of the parts were going to take a while. I stopped the order on these good to have parts, and thought that my order would ship right away. I decided to pay for express shipping. 5 days later, I was told that the parts would be shipping in a few more days. So much for express shipping. I bitched and they gave me the express shipping free. I lost 3 weekends of riding. Two of these weekends were perfect February riding days. The other we had no power and could not get out of our driveway with a car, but still.
As I said, not a difficult job, once one has done it once, but a lot more involved than it really should be, with plenty of places that allow for catastrophic mistakes.
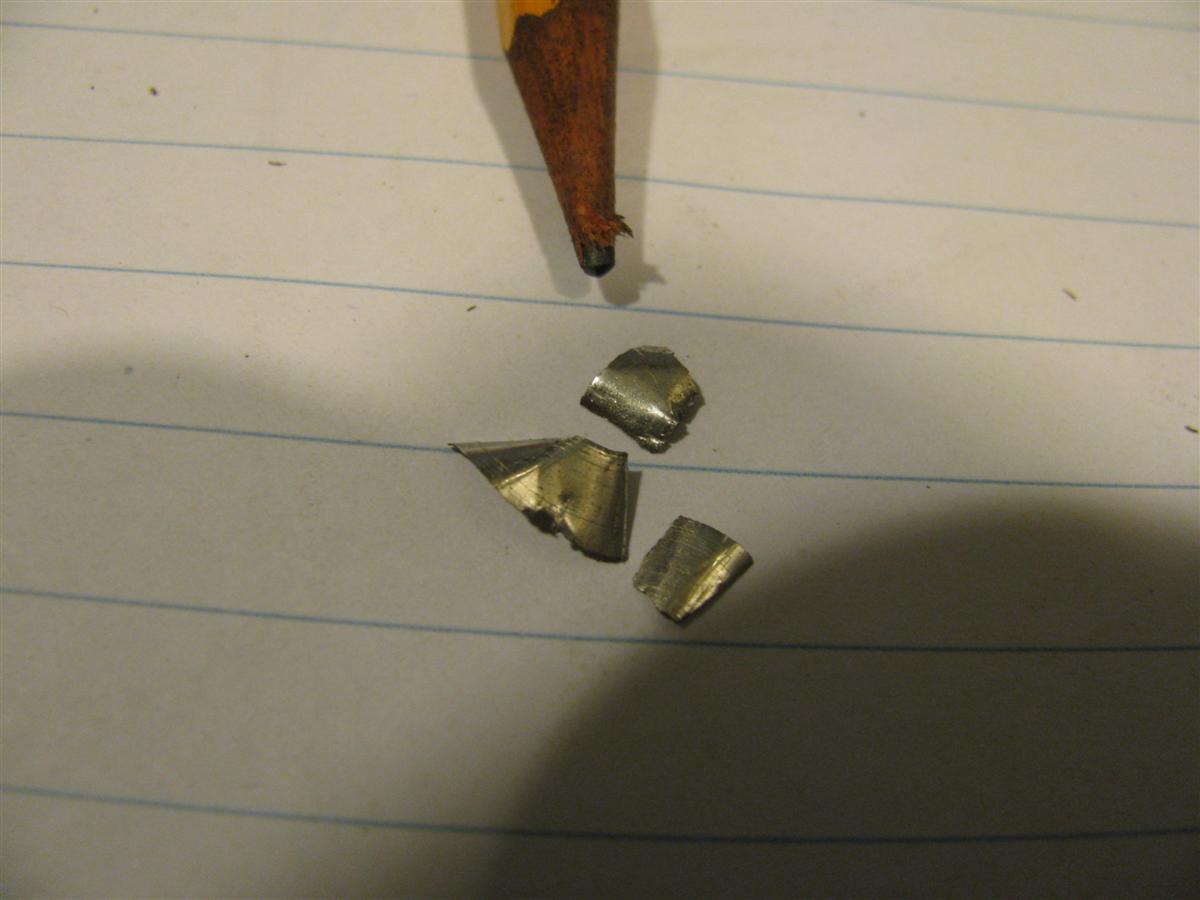
Oh, and another thing. I found a peice of metal in the engine that obviously came from the original machining of the engine. Does not give one a warm fuzzy there.
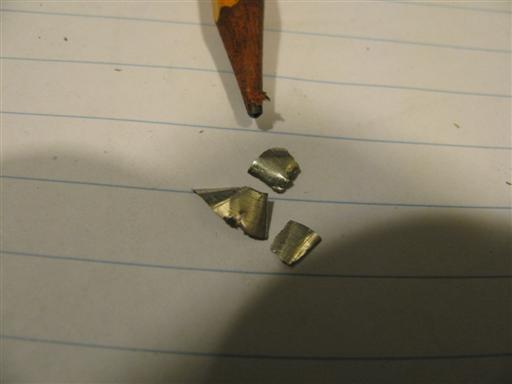
This is a piece of metal that was jammed in a crevice in the engine. It was tricky to get out without breaking it and having it go into the engine. I don't know if it would have caused a problem if it was floating loose, but I was glad I didn't have to find out.
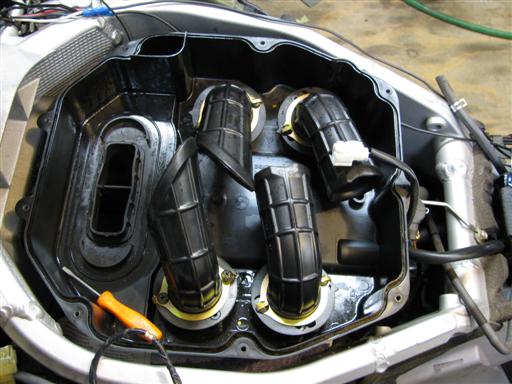
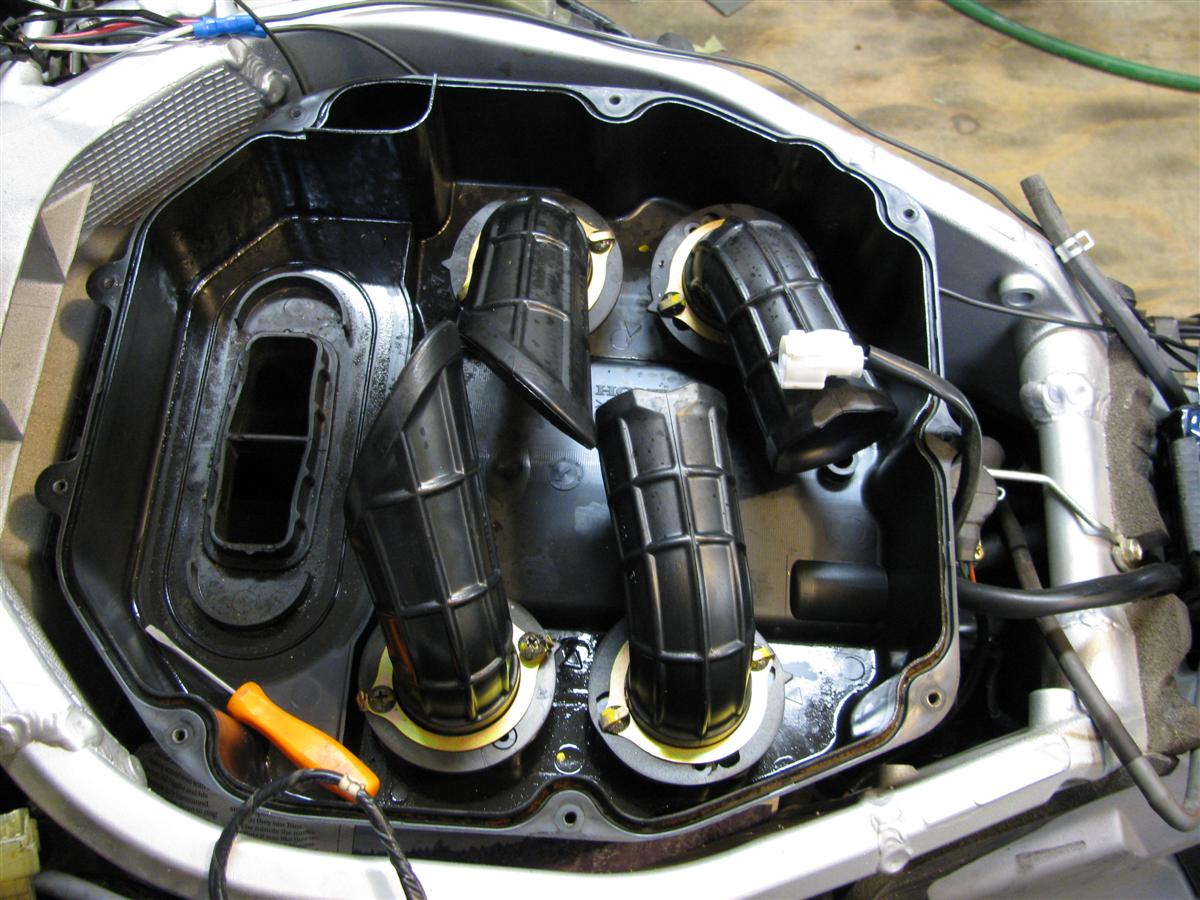
The airbox. The front of the bike is to the left. This all sits under the fuel tank.
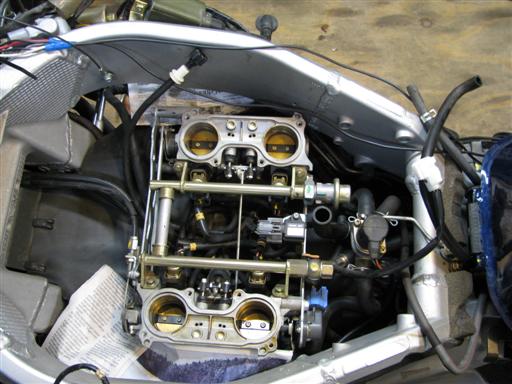
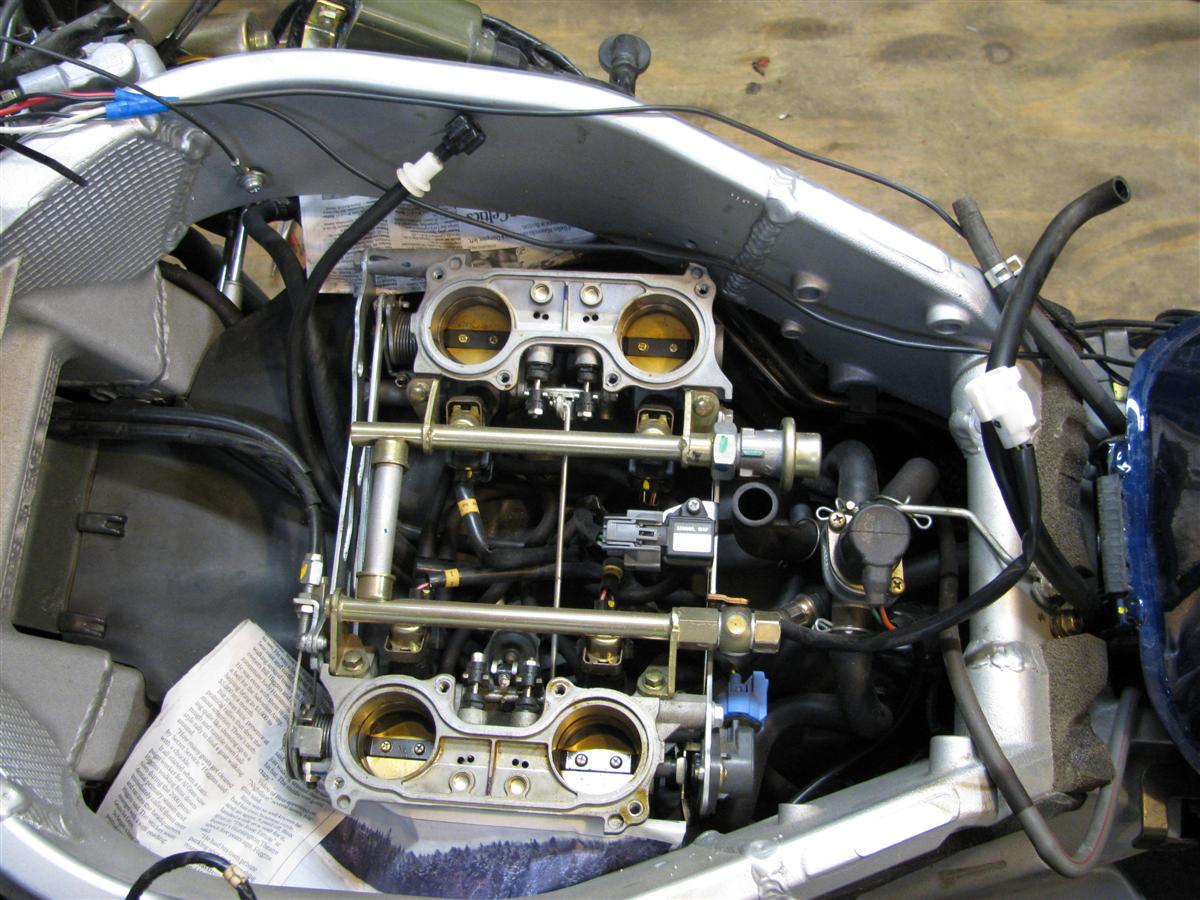
The throttle body. All four are bolted together and come off as one. This took a lot of pulling and swearing to get loose. The swearing helps, honest.

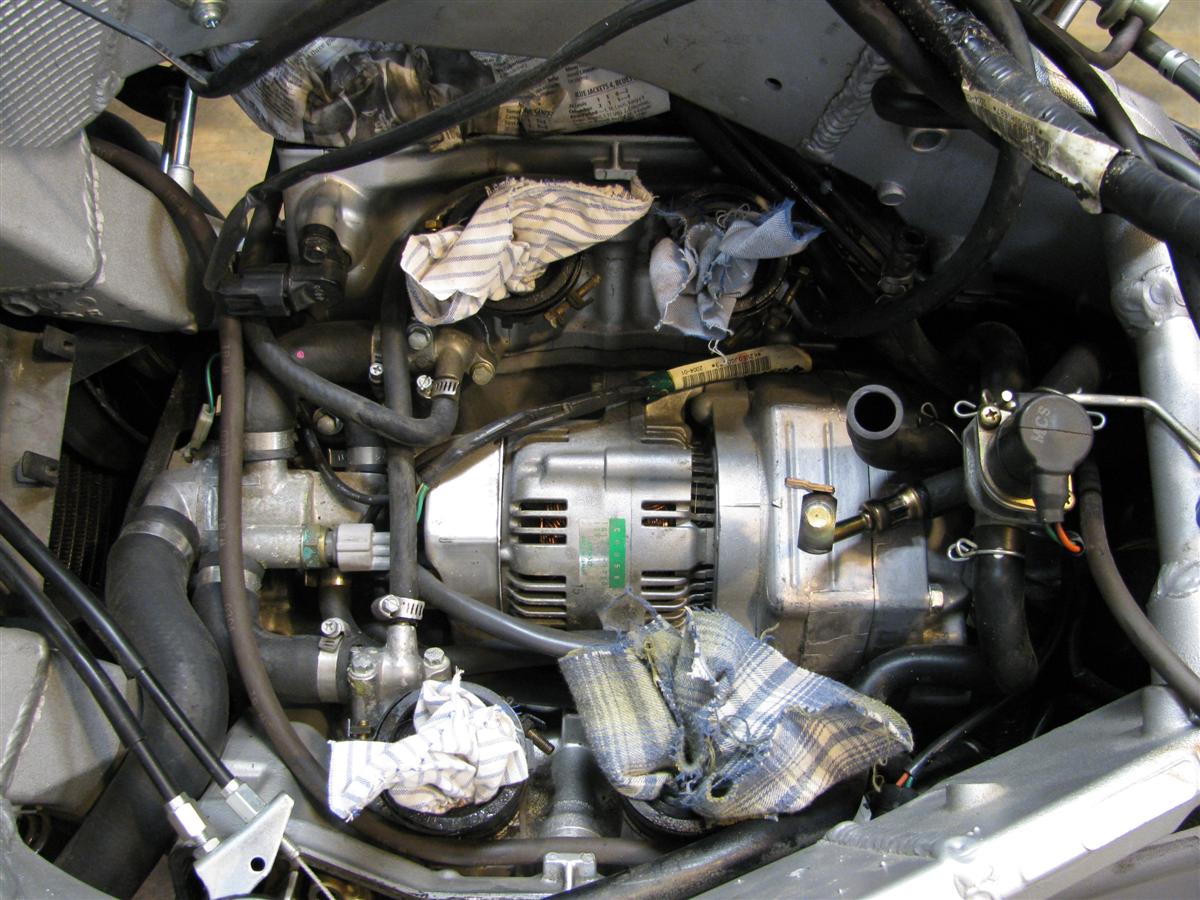
Under the throttle body. That is the alternator. They advertise that the alternator is air cooled. Yeah, with air coming off a hot engine. Notice all the hoses, some carrying gas, some vacuum and some antifreeze. Those are rags stuffed into the intakes.